
 As with most people, I love the image of Mona Lisa and her enigmatic smile. But it has always bugged me that the woman is missing eyebrows. I love a good full brow as seen in my header image above. As a child, I used to draw brows on Mona Lisa’s face (still doing it!) Later, I discovered that plucking eyebrows was not in fashion until years after Mona Lisa was painted and I was left wondering…where did her eyebrows go?
Now the mystery of the missing brow line is finally solved. Pascal Cotte, a French engineer and inventor, used a high-definition camera to discover the lost hair in the famous painting. Turns out that good old Mona got over plucked by either the ravages of time or a few overeager attempts to restore her image. You can read more about it here.


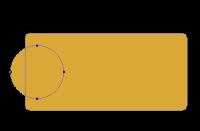 3. Next, hold down the shift key and draw a circle to the left side of our square (figure 2). (holding the shift key constrains the proportions of the circle)
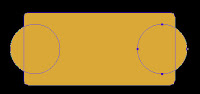 (The alt key makes a duplicate and the shift key makes sure that the second circle is aligned with the first). You will now have one fully editable shape. (figure 4)


