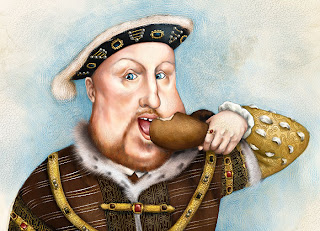
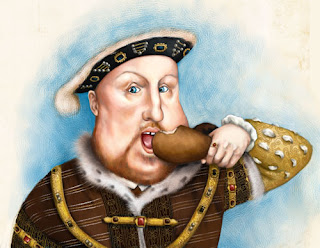
 I had a hard time choosing which “heavy” image to post for this week’s Illustration Friday. Sure…the circus fat lady is always a crowd pleaser, but big Babe Ruth has had her time in the limelight. Instead, I thought I would share some very heavy images from my next book, The Raucous Royals. This book is for kids of all ages who hated history. It is history with the juicy bits left in and debunks all the rumors, myths and scandals that have survived through the decades. One of the myths that always fooled me as a kid (and adult) was that Henry VIII was this rotund king storing acorns in his mouth. This image has been ingrained in my mind. Sure, good old Hank was not a looker in his old age, but in his younger day he was quite the ladies man. People from all over talked about his shapely legs and athletic physique. (Legs were especially important in Tudor times. If a guy had nice legs then he was considered a real hottie. Today, I would have to say that legs are the least looked at part of a man’s body.)
So to follow along with the cliché image of big fat Henry, I painted him in this typical eating a turkey leg pose.
Here are some of the stages of the image.
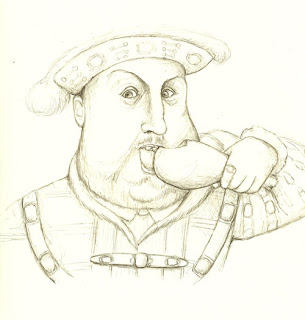
1. Initial Sketch
I first drew a sketch in good old pencil and paper and then scanned it in.
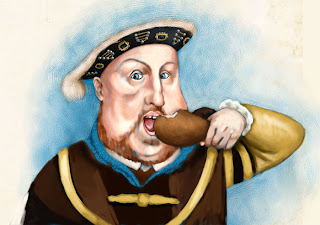
2. Base Colors
I then brought it into Painter and began to flesh out the colors using the Real Bristle Oil brushes. I chose Curled Wood Shavings as my paper to give a slight texture. I hate this stage because it looks very “digital”. I can see those digital gooey paint strokes. (Everyone who has worked with both traditional and digital oils knows what I am talking about)
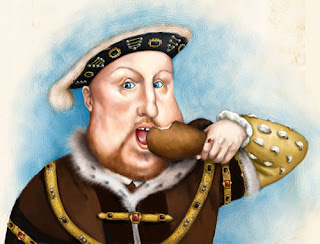
3. Texture added
At the next stage, I increased the Feature (Found on the top of your screen under the brush controls) of my Real Round Oil brush so that the brush strokes start to show through. Now it is starting to look more like the oil medium. I also at this point added in Henry’s fur collar with the Furry Brush (it is under the Fx brushes). I love the furry brush because I am inherently lazy and the brush creates very realistic looking fur without having to vary the size of your oil brush.
4. Fabric Details
At the next stage, I started to add in all the fabric details on his robe. I love dressing historical figures. For Henry, I researched Tudor fabrics and scanned in the fabric patterns that I planned to use.
Here are the Steps to create the fabric details in the front of his coat.
- I scanned in the pattern that I planned to use. You can see an example of the Tudor pattern that I used here.
- Next, I opened this scan in Photoshop and used the Levels command to force the dark grey background to black. To do this select Image/Adjustments/Levels and select the black picker (below). Once you have selected the black picker, click on the darkest area of the image. You should see all the dark areas go to black.

- This is great but now we need to inverse the image so that all the black areas are white and the white areas are black. To do this, go to Image/Adjustments/Inverse.
- Almost there. Now select the whole image (Ctrl/Cmd + A) and go to Edit/Define Brush Preset.
- Now we have created a pattern brush that can be “stamped” on to Henry’s robe. Just select our new brush from the list of brushes, create a new layer, and then click once where you want the fabric pattern to go. In this case, I had to do this a few times because he has rows of stitching.
- The last step is to bend it to the fold of the clothing using the Warp tool. (Edit/Transform/Warp).
Voila a royal pattern for our portly king.
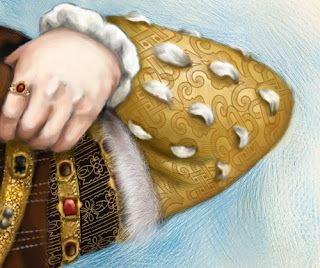
The last step is to create a crackle- like pattern so that it looks like a truly aged oil painting. Here is an up close detail of the crackle affect.
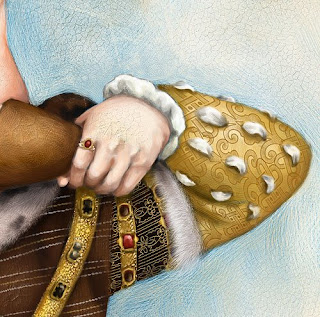
5. Crackle it
To do this, I selected the Square Pastel brush and one of the Crackle papers from Painters list of papers. You want to make sure to choose a contrasting color so that the crackles show through. You also have to make sure the grain is low enough for the pastel to sit on top of the paper. You can find the Grain controls on the top bar. I set mine at 8%. And always do this on another layer so you can take some away if you get a little crackle carried away. This is where I love digital painting because it gives you the freedom to experiment without all those nasty crackle medium fumes.
If you have any technical questions about this process then feel free to email me at info@CarlynBeccia.com. And watch for The Raucous Royals (Houghton Mifflin) in September this year!

16 comments:
great illustration and great choice for the topic, and thank you for sharing the process, I'm hoping to get started on some digital painting soon and this will really help
Wonderful, informative post!
As far as the legs go, maybe if men started to wear tights again.....or..maybe not!
Great illustration.
Incredible! you are most talented!
I love this and thank you very much for the detailed explanation. I very much wondered how all that was done. I could only afford Paint Shop Pro and really just beginning to understand .1% of that.
What a wonderful illo and funny comments. Seeing the picture in progress is wonderful. Thanks for sharing. I will look for your book- best wishes with it-
What a discover your blog. My husband and I are flabbergasted!
Really cool.
Fun illustration. I really appreciate you taking the time to explain your process. Thanks!
Great drawing. Thanks for all the info too.
I am amazed on how you do this. I just got a wacom and have not been trained to work on the computer this way so I am trying my way through it. I think your digital reminds me of Anita Kuntz.
I think I would have to take classes on how to do this!
Ellen
Wow! - Great art-- great tutorial!
Fantastic illustration and thanks for sharing the process. I am mainly working on photoshop but I will try painter now. You are very talented.
Marvelous! I loved the explanation of all the tricks of the trade that made this such an enchanting illustration. And I appreciate that you set the rumor of fat Henry to rest. He was quite more dashing as a young man, than many imagined. Great work as always!
It's great to see your progress and I was always curious about pattern stamping, I'm going to have to try that one out!
Great work!
~bonnie
Hey there! Glad to see you back! I can't wait for your new book. I'm a sucker for history. I'm thinking I really DO need to get a copy os Painter. Photoshop is very heavy.
Also, got baby pics (a bit behind here)?
:)
mishka
i'm amazed, thanks a lot for the information:)
the illustration is really funny
Your place is valueble for me. Thanks!…
Skillshare.com
Information
Click Here
Visit Web
Post a Comment